Microgreen Love
We LOVED seeing so many folks at our “Plant One On Me” Microgreens Workshop! We had a great turnout for learning about microgreens and how easy it is to grow them at home. But decorating rocks for tray weights took center stage!
For those of you who weren’t there (and maybe as a refresher for those who were), here’s a quick guide on how to grow microgreens at home:
S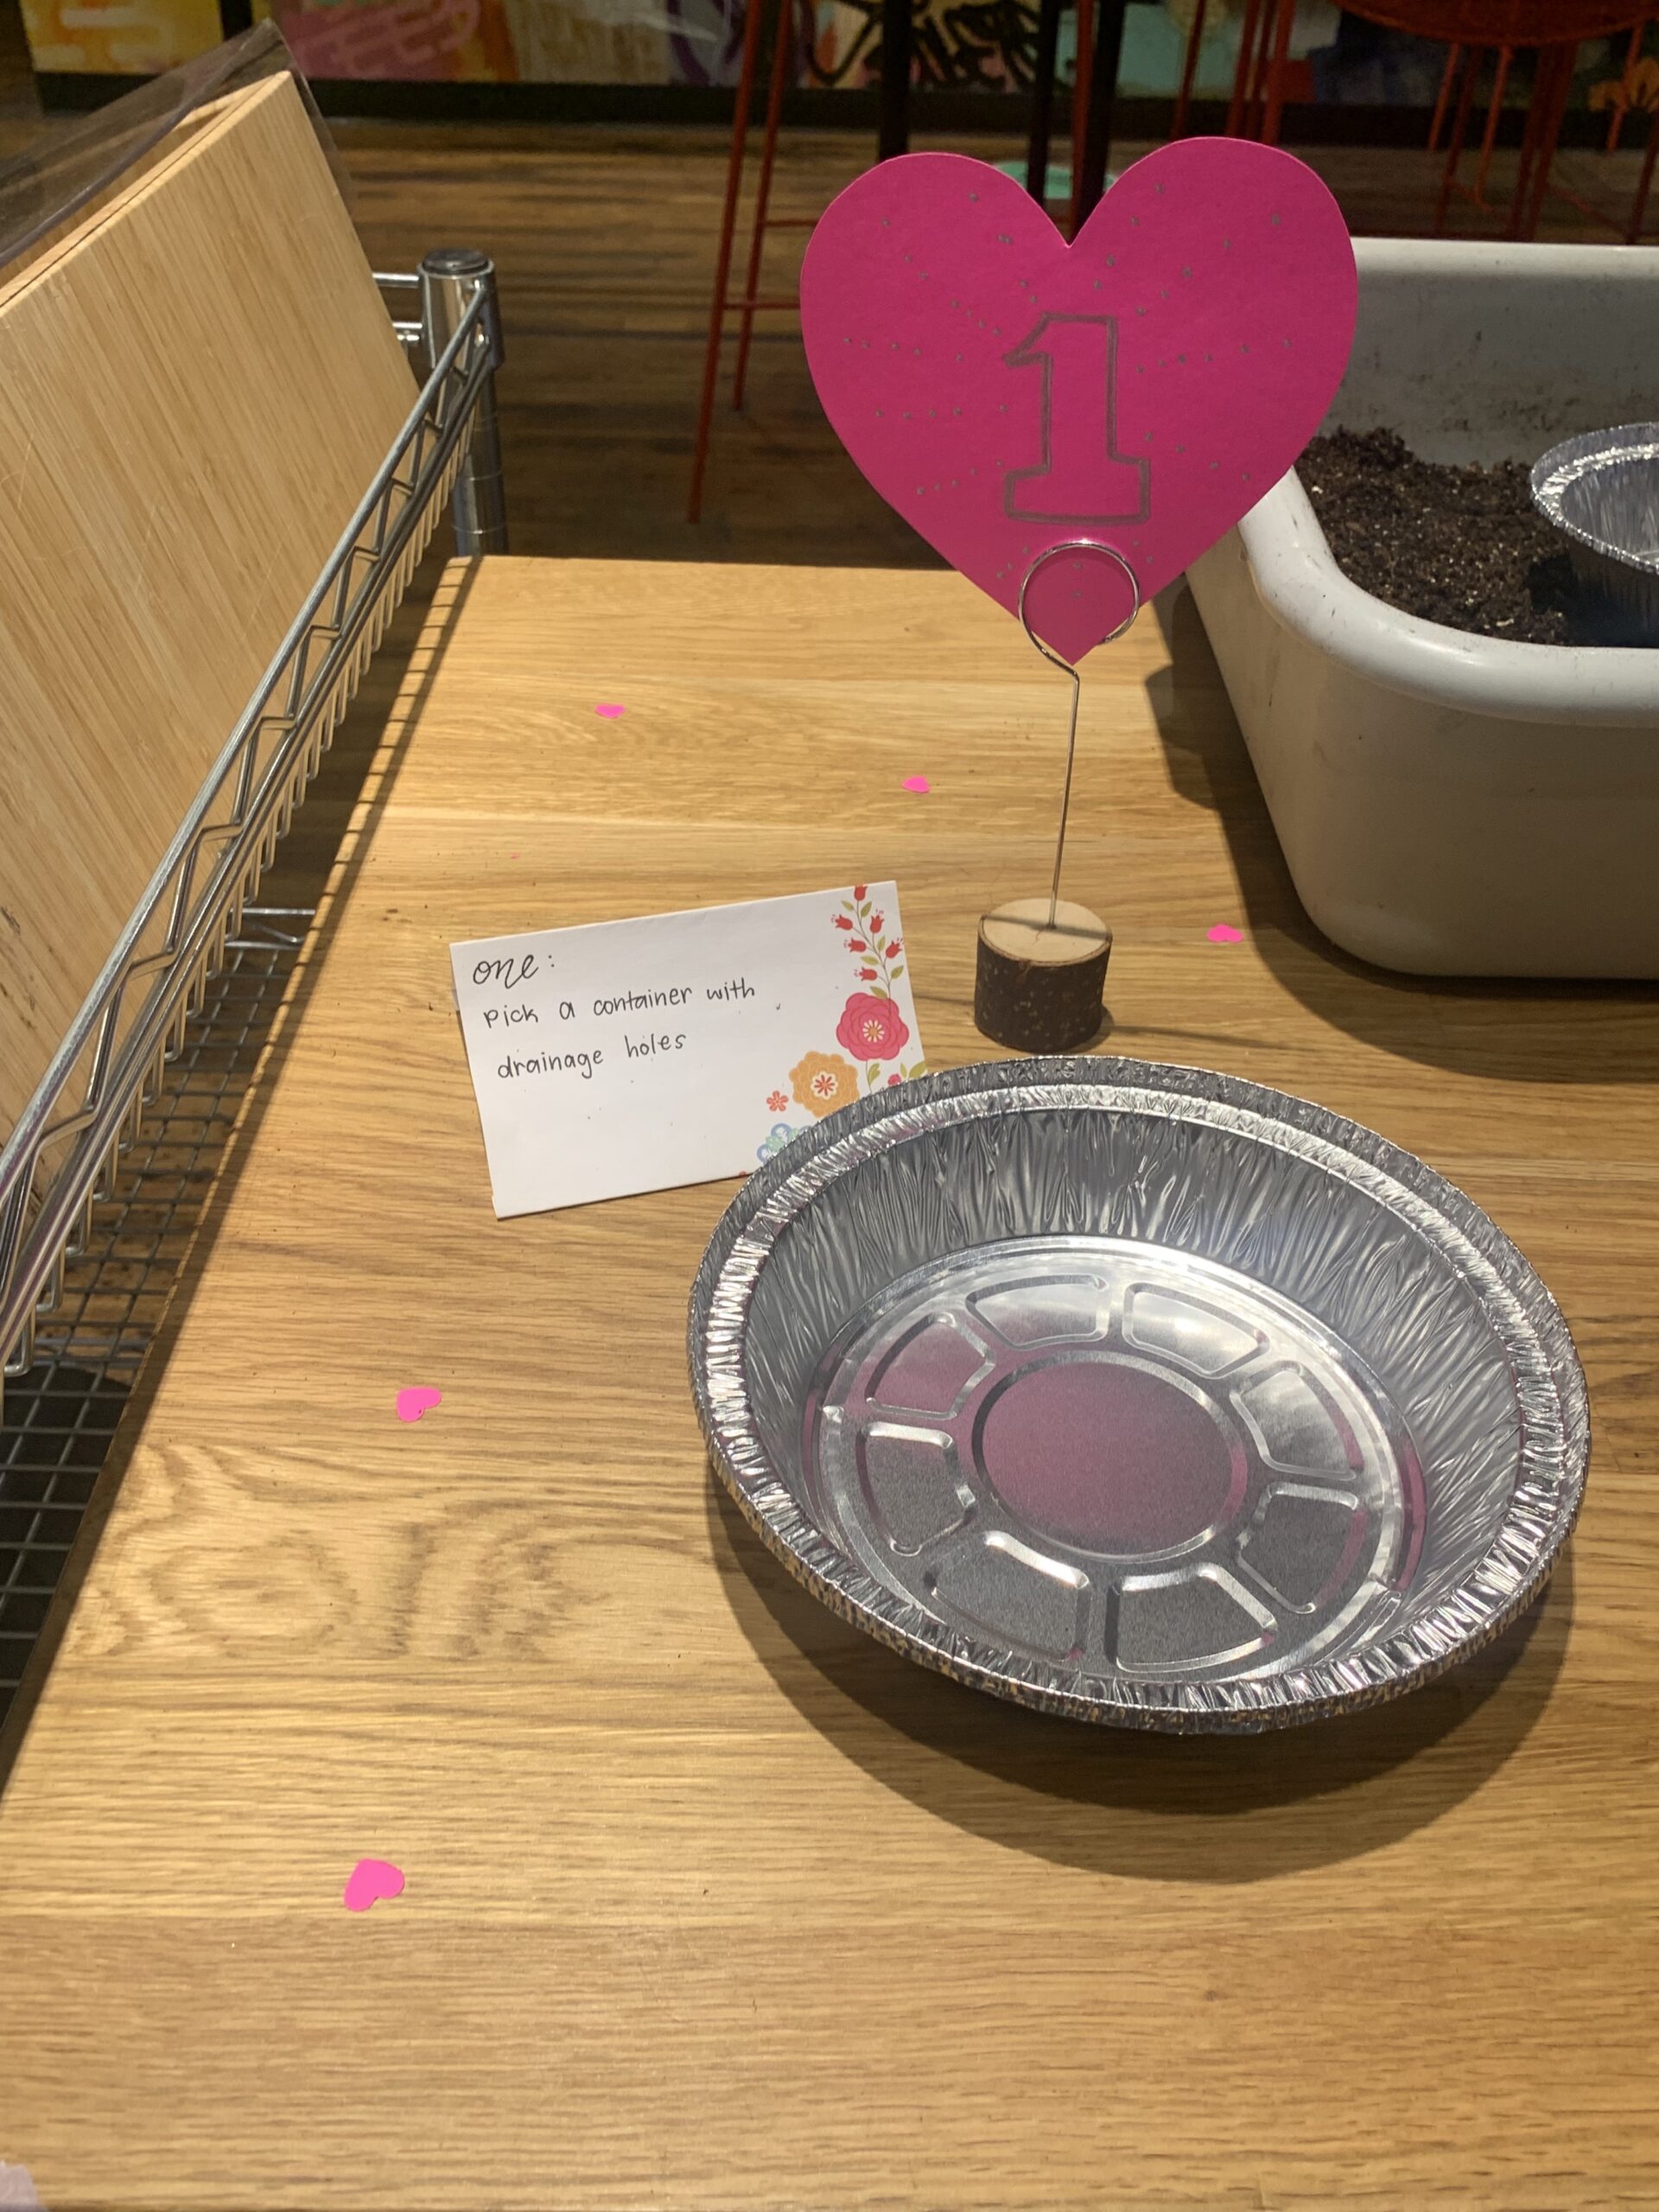 tep 1: Pick a fairly shallow container that you can add drainage holes to (such as a take-out container). Carefully use scissors or another pointed object (like a screwdriver) to make evenly spaced holes throughout the base (about eight for work for the pictured container).

Step 2: Fill your container with moist, potting soil close to full.
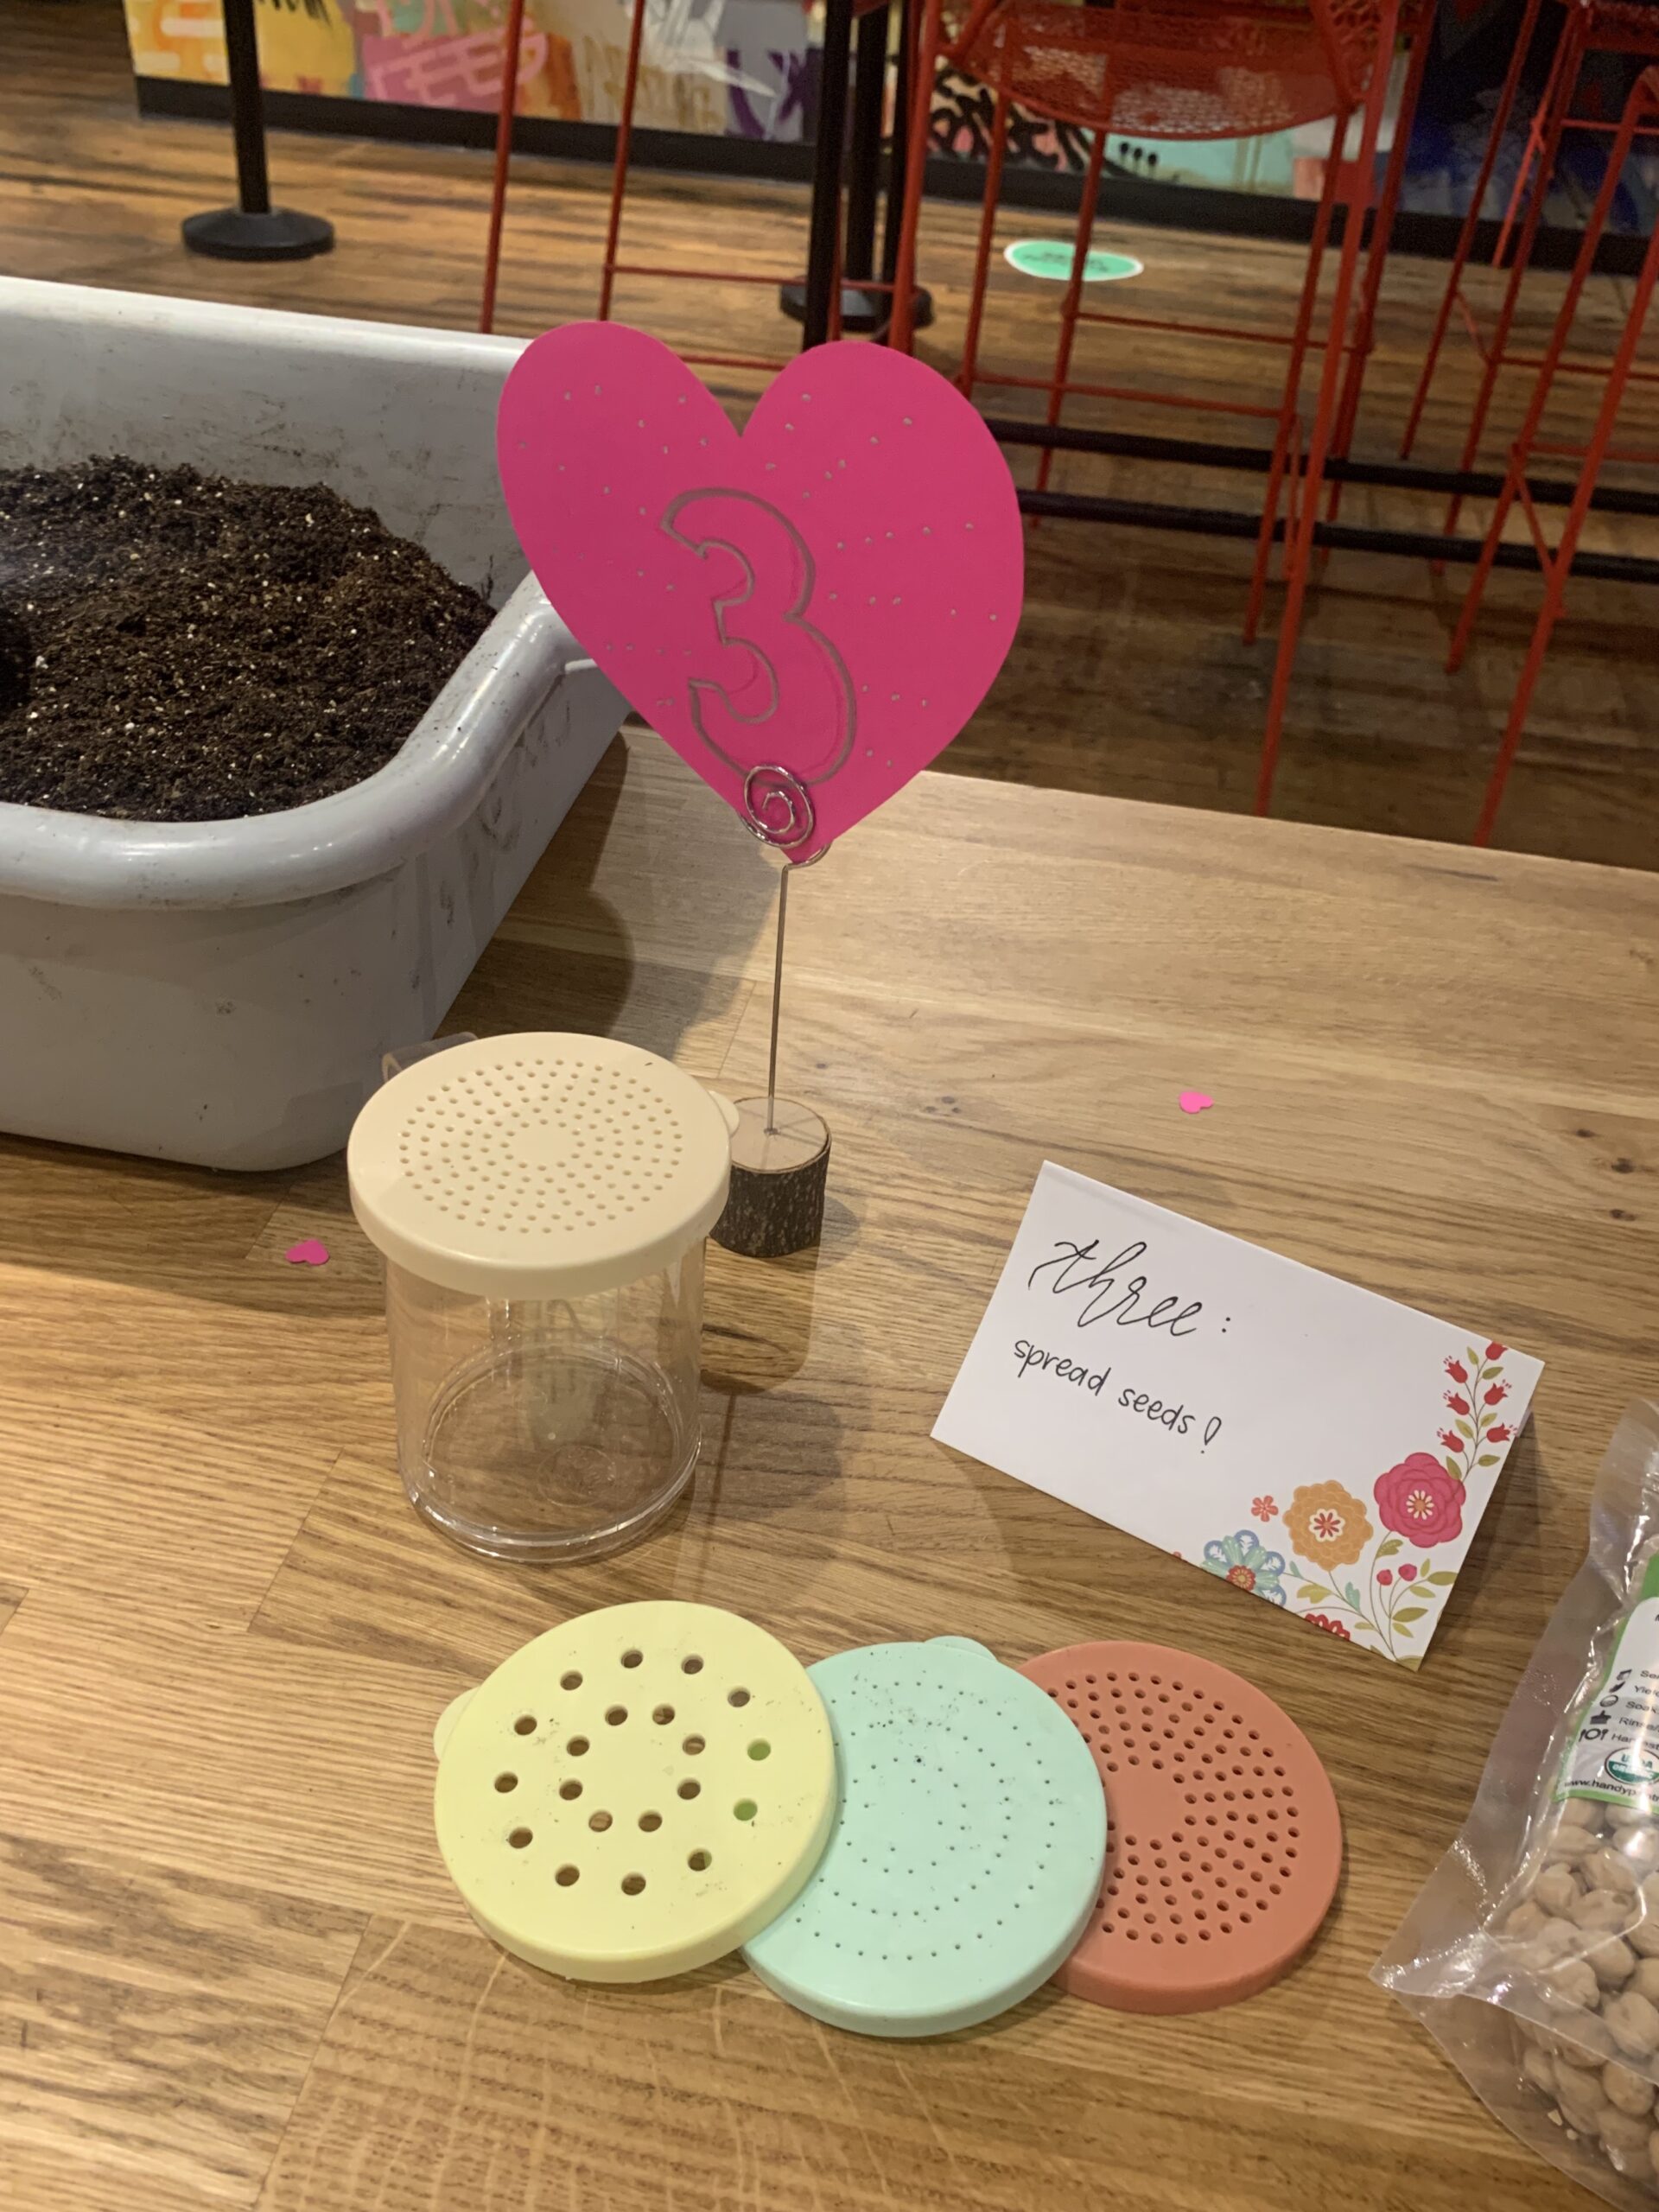 Step 3: Spread your chosen seeds (great options for microgreens include Asian greens, basil, amaranth, cilantro, or mustard) in a fairly even layer across the soil. The larger the seed, the more space it needs around it to grow. DO NOT COVER YOUR SEEDS WITH SOIL! You want clean microgreens (which you harvest right at the soil level), and if you cover them with dirt the sprouts will need to push through the soil and need to be cleaned before consumption.
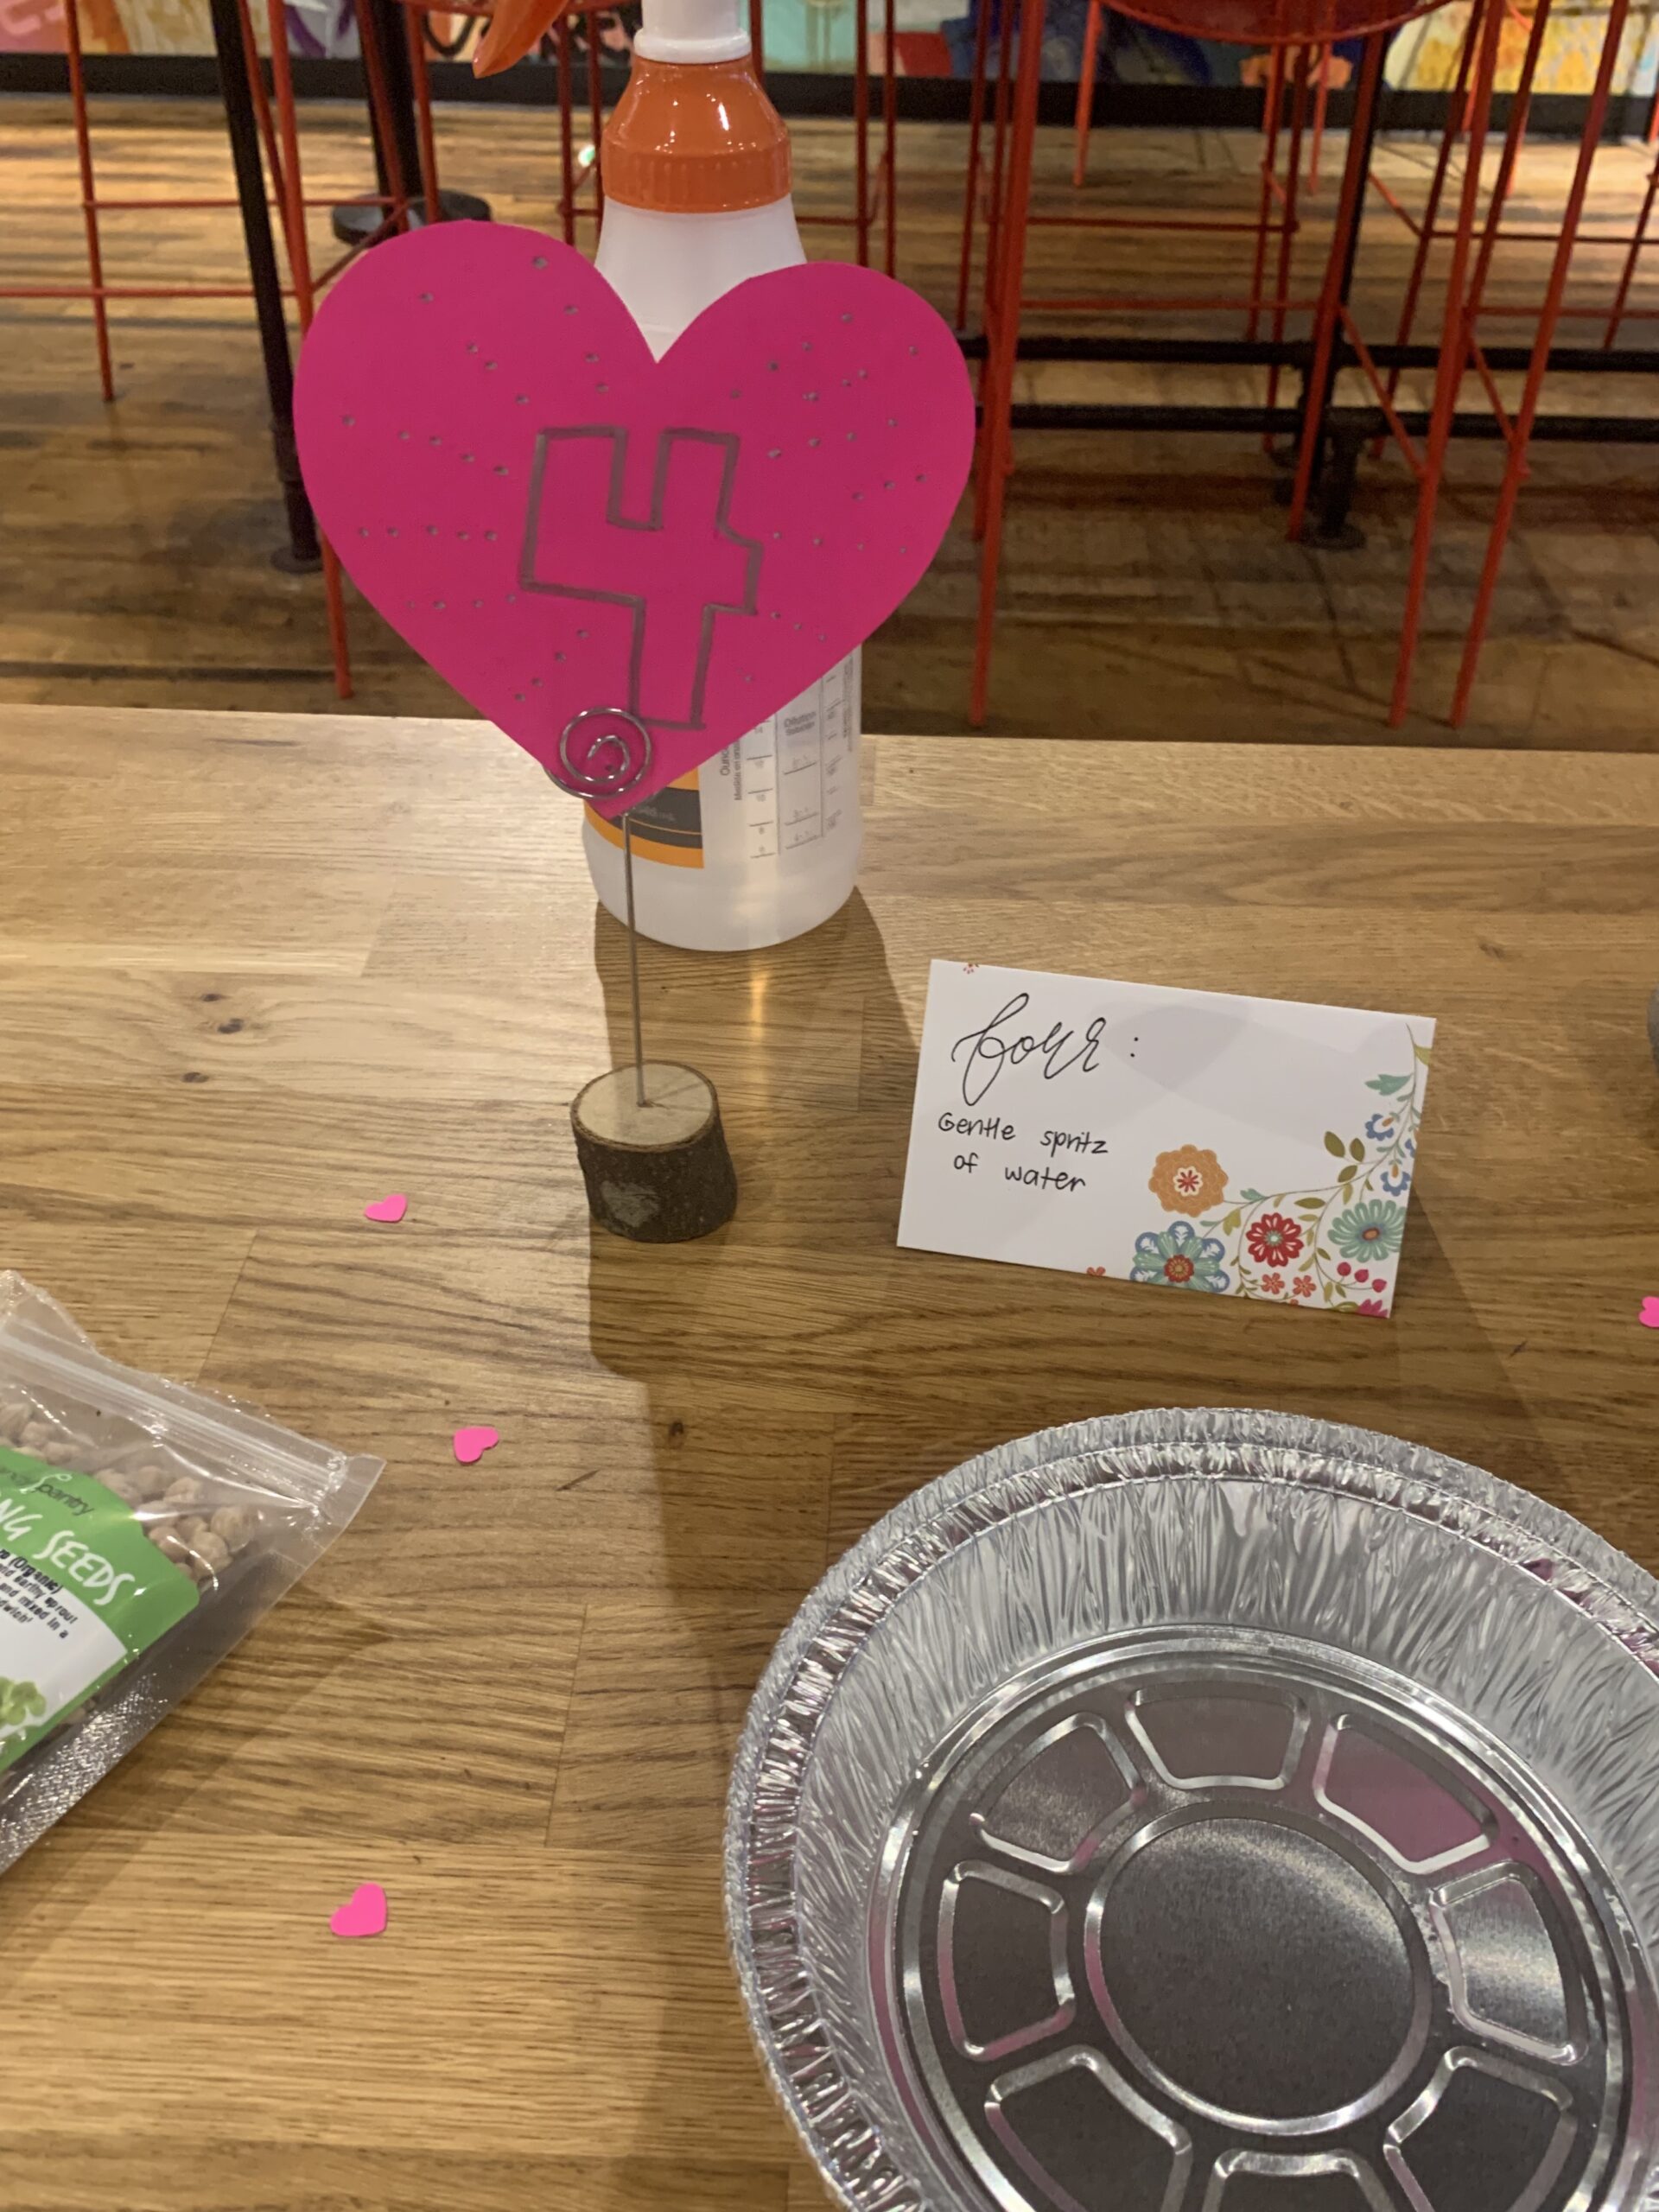
Step 4: Spritz your seeds with water. DO NOT POUR WATER ON IT! Excess water can foster mold or drown your seeds.

Step 5: Cover your container (you can use another, similar-sized take-out container or a bowl) and weigh down (you can use a rock or a juice glass or something of similar weight). Continue to spritz every day or so with water, being careful not to overwater.
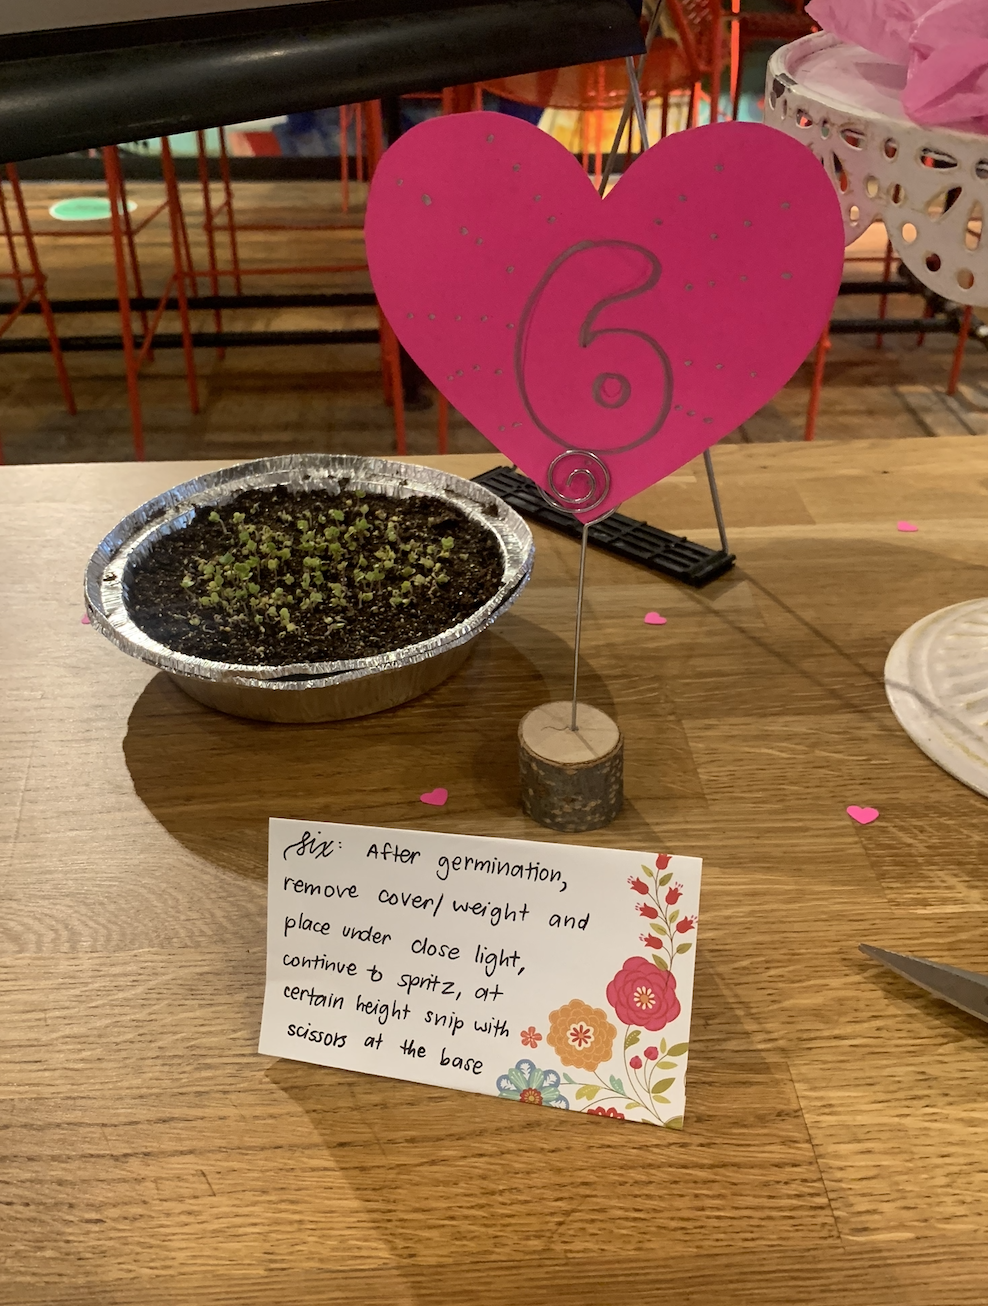
Step 6: After germination (which can take anywhere from one to two weeks, the cover will start to lift when sprouts are growing up from the soil), remove the cover and weight. Place your container of germinated microgreens under a growing light or near a very sunny window for optimal growth. Once your microgreens have reached a healthy growth point, snip (with scissors) near the base and add to your favorite dish!
For more instructions or for Spanish, check out this great resource from an extension of Oregon State University here!
_________________________________________________________________________________________________________________________________________________
If you’re curious about other, edible options for growing at home, check out this quick overview of sprouts vs. microgreens vs. baby greens.
- Sprouts
-
-
- Sprouts are grown without soil! Seeds are soaked for 8-12 hours to begin germination, then the container is drained and seeds are rinsed twice daily until the seeds germinate and form their initial leaf structures (cotyledons) – a process which takes just a few days.
- Sprouts are eaten whole (including the remaining seed structure) – as a result, they are found to be better sources of amino acids, fiber, and sugar than microgreens although both are known as nutrient dense superfoods.
- Disclaimer: while sprouts grow best in warm, moist environments, these are also prime conditions for bacterial growth which can cause illness so it’s important to ensure your seeds, container, and water are bacteria-free. Safety precautions for growing sprouts can be found here.
-
- Microgreens
-
-
- Unlike sprouts, Microgreens require a growth medium such as soil or a growth mat/cloth/paper towel base). Germinated seeds are planted on top of just 2-3 centimeters of soil (not covered!!), or are planted on top of the growth mat and should be misted often. Microgreens take 1-2 weeks to be ready for harvest (depending on variety) and are harvested at the base of the sprout – leaving the seed and initial structure behind.
- Microgreens are known for their high concentration of antioxidants and other nutrients like potassium, iron, zinc, and magnesium – most are over 5 times more nutrient dense than their fully grown counterparts!
-
- Baby Greens
-
- Unlike both sprouts and microgreens, baby greens can be grown outside and can be started indoors/in a greenhouse then transplanted or direct-seeded (started outdoors).
- Baby greens are also harvested just above the soil line, and only the primary leafy structures are eaten. They are harvested early to achieve the desired baby variety, but could otherwise mature to the full-size greens we are familiar with. As such, baby greens are still exceptionally tasty and nutritious, but their nutrient content is equivalent to that of their full-size counterparts.
Regardless of what you’re choosing to grow, safety should always be the number one priority. Here’s a useful guide for at-home garden food safety!
_________________________________________________________________________________________________________________________________________________
We wanted to share some other great shots from our Microgreens Workshop:


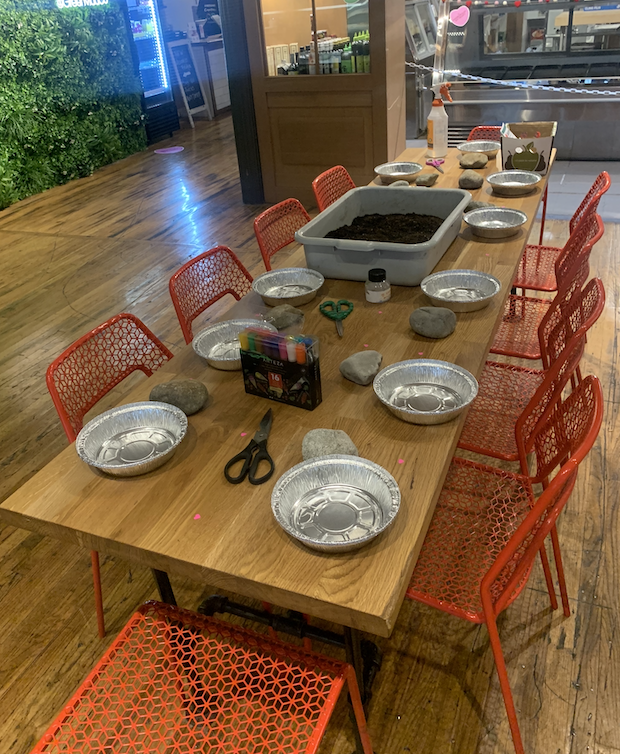
Figure 1: some Amaranth that had been growing for a couple of weeks before the event
Figure 2: a live demonstration from our workshop
Figure 3: the table pre-workshop with all the supplies (including markers for decorating rocks!)